
Sometimes you may have unwanted visitors in your website and you may want to prevent access for these types of users. You can restrict access to your website using .htaccess file or cPanel IP Blocker.
Restrict access to your site using .htaccess file
The .htaccess file contains several directives (instructions) that guide the server how to behave in certain scenarios and directly control your your website functions. There are some common directives like redirects and rewriting URLs that can be found in .htaccess file. There are many scripts and content management systems such as WordPress, Joomla and Magento that add directives to the .htaccess so that all functions can run smoothly.
Step 1: Login to your cPanel account.
Step 2: Go to the File Manager and edit your .htaccess file.
Step 3: You can now create necessary directives to restrict access to your website. You can prevent access for a single user or a range of users and even all users (based on IP address) with .htaccess file. And also you can prevent access to a certain types of files or a single file (i.e configuration file).
Deny access to all files & folders via .htaccess
To deny direct access to all files and folders on your web server, use the following directive:
deny from all
Deny access to a certain type of files via .htaccess
In case you want to restrict access to a specific file types in your website, add this rule in the .htaccess file. We are blocking access to .php files in this example.
Order allow,deny
Deny from all
To prevent access to any other file type such as .html or .js, just replace the extension in the first line of the above code. We are blocking access to .js files in this example.
Order allow,deny
Deny from all
Deny access to a specific file via .htaccess
Add this following rule in the .htaccess file to prevent access to a specific file such as configuration.php file
order allow,deny
Deny from all
To change the file, just replace the file name (configuration.php) in the first line of the rule.
Prevent access from specific IP addresses via .htaccess
Add this following rule in the .htaccess file to prevent access to your website from specific IP address.
deny from 976.271.238.330
To deny access to your site from a block of IP addresses, simply omit the last octet from the IP address:
deny from 976.271.238.
This will block access for the range of IP addresses from 976.271.238.0 to 976.271.238.255. That means the full block of IP is restricted for access.
Prevent access from specific domain via .htaccess
If you wish to deny access to your website via links from specific domains i.e baddomain.com, this can be done with .htaccess file. A visitor who comes to your site from the URL hosted on the blocked domain will get 403 Forbidden error message.
SetEnvIfNoCase Referer "baddomain.com" bad_referer
Order Allow,Deny
Allow from ALL
Deny from env=bad_referer
Replace the domain name in the first line of directive with your target domain (that you want to block). For a more subtle approach, you can use this rule to block the domain with displaying 500 Internal Server Error notification.
RewriteEngine on
RewriteCond %{HTTP_REFERER} anotherbaddomain \.com [NC,OR]
RewriteRule .* - [F]
Restrict access to your site using cPanel IP Blocker
Another way to prevent access to your website is using cPanel IP Blocker. This is easier way to restrict access to the website for the unwanted visitors. And at the same time, it is less flexible than using .htaccess file. For example, with IP Blocker you can deny access to your website by IP address, IP address range or domain name, but you cannot remove access to specific files or file types. Let’s get started using IP Blocker.
Step 1: Login to cPanel account.
Step 2: Go to the SECURITY section and click on the IP Blocker.

Step 3: Insert your target IP, range of IP addresses or the domain you want to block in the Add an IP or Range field and click on the Add button. You can block as much IPs or domains as you wish.
IPv4 Format
- Single IP Address 192.168.0.1
- Range 192.168.0.1-192.168.0.40
- Implied Range 192.168.0.1-40
- CIDR Format 192.168.0.1/32
- Implies 192.
IPv6 Format
- Single IP Address 2001:db8::1
- Range 2001:db8::1-2001:db8::3
- CIDR Format 2001:db8::/32
Restrict Access from specific IP addresses using IP Blocker
Insert your IP address or a range of IP addresses that you want to restrict from accessing.

Deny Access from specific domains using IP Blocker
Insert your IP address or a range of IP addresses that you want to restrict from accessing.

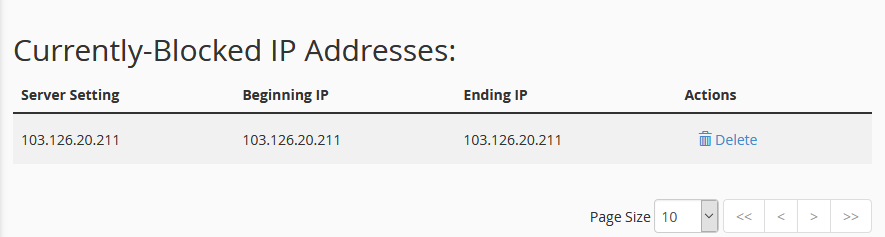
Manage blocked IPs and domains via cPanel’s IP Blocker
You can manage your currently blocked IPs & domains at the bottom of the IP Blocker page. You can delete any blocked domain or IP address from here.
We hope this tutorial helps you find the perfect solution. If your like our tutorials, definitely you’ll love our support. All VernalWeb hosting plans include 24/7 support from our amazing inhouse support staff. Check out our web hosting plans and have your website migrated today!